After you have spent hours and hours on making the perfect cosplay, another fun yet seemingly daunting task every cosplayer comes across is makeup. In this post I will break down my basic cosplay makeup routine step by step. I will keep this tutorial very simple and only include what I think are the main essentials for cosplay. The majority of the makeup I use are very affordable and beginner friendly as well.
Disclosure: Some of the links below may be affiliate links, which at no extra cost to you, I’ll get a small compensation. But don’t worry, I’ll only link to products that I have personally tried and loved. Using my links also helps me out a ton!
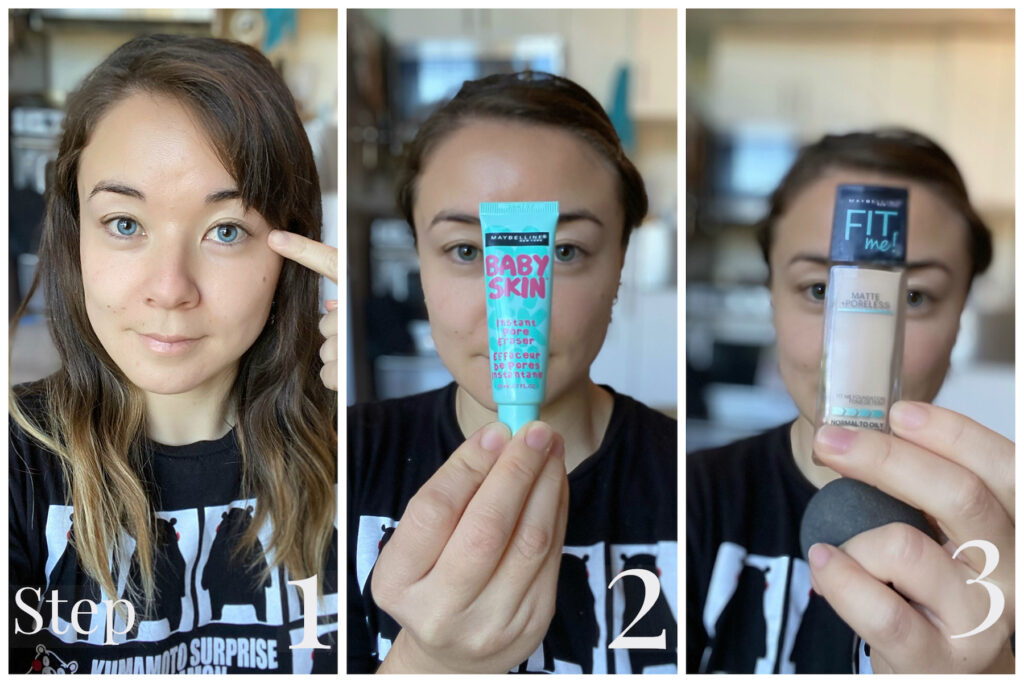
Step 1. Contact Lens
While my hands are still clean, I always place my colored contacts in first. Finding vibrant comfortable colored contacts has always been very tough for me. I have yet to find a contact lens brand that I am in love with. Often times, I can only wear my cosplay contacts for a few hours before the discomfort sets in. When buying contacts for cosplay, always pay attention to the curvature of the lens as well as the diameter. I have noticed 14.0mm lens are the perfect size for my eyes; 14.5mm being too large.
Remember to always buy contacts from a reputable place. Your eyes are very sensitive and you only get one pair for a lifetime. If you feel any discomfort while wearing your lens, take them off immediately. No contact is worth damaging your eyes over.
I have tried Eyecandy and Honey Color’s contacts before (I am wearing Eyecandy in these photos). They work well for short term but I would not recommend wearing them all day. I am still looking for great bright colored contacts with prescription, so if you come across a brand you love, please let me know.
Step 2. Primer
I am currently using Baby Skin Primer. I place a small amount onto my fingertips and smooth onto my face and neck. Primer is great for filling in large pours or other small deviations on the face. This creates a smoother canvas for when the foundation is applied.
Step 3. Foundation
Next, I use Maybelline Fit Me Matte + Poreless in 110. I pour a fair amount of foundation onto the back of my hand and use a beauty blender to evenly apply the product onto my face and neck. Once the first layer is applied, I go in again with a second layer. If you feel like the coverage is not enough, go in with a third layer.
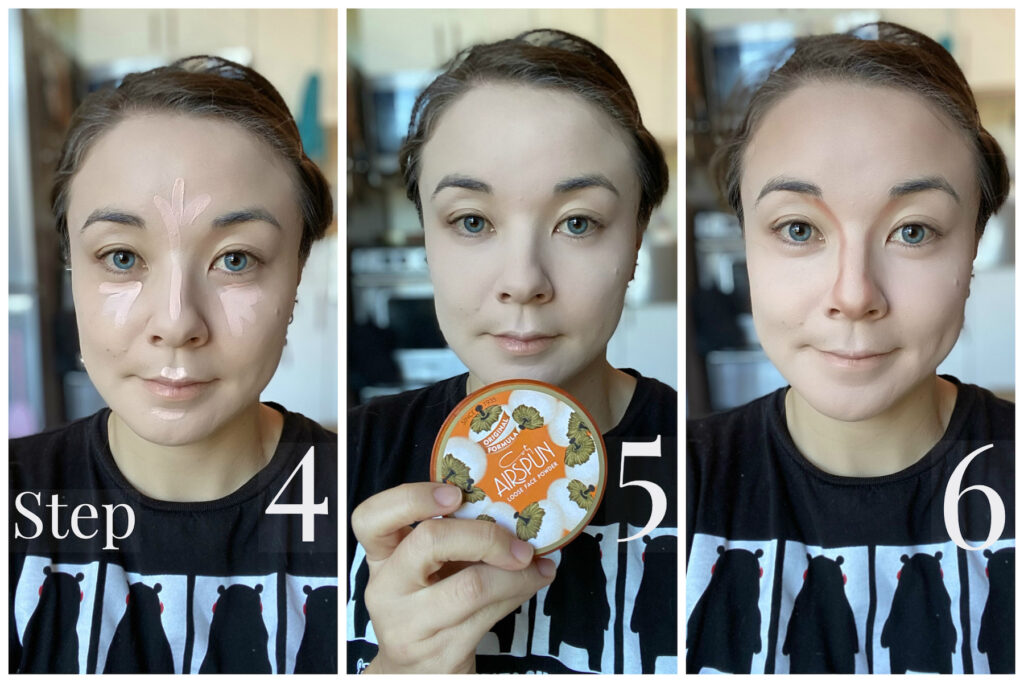
Step 4. Concealer
After I am happy with my foundation coverage, I go in with Becca Shimmering Concealer to conceal the center of my forehead, down the center of my nose, under my eyes, the top of my lip and just under my lower lip. Concealer gets rid of any darkness under the eyes and helps brighten the center of my face. Blend in throughly.
Step 5. Baking
I use a large fluffy brush to apply on Airspun Loose Face Powder on my face focusing on my t-zone and smile lines. Baking aids in setting all the liquid makeup I just used onto my face. I let the powder sit on my face for about 5 to 10 minutes before I brush off the excess powder.
Step 6. Bronzer
I then use a fluffy brush and go in with NYX Professional Makeup Matte Bronzer in the shade medium and lightly apply under my cheek bones, around my jaw line, and temples. Using the same bronzer, I take an eyeshadow brush and contour my nose as shown above. Bronzer helps create a slight shadow for more definition on my face and the appearance of a smaller nose. Blend in properly.
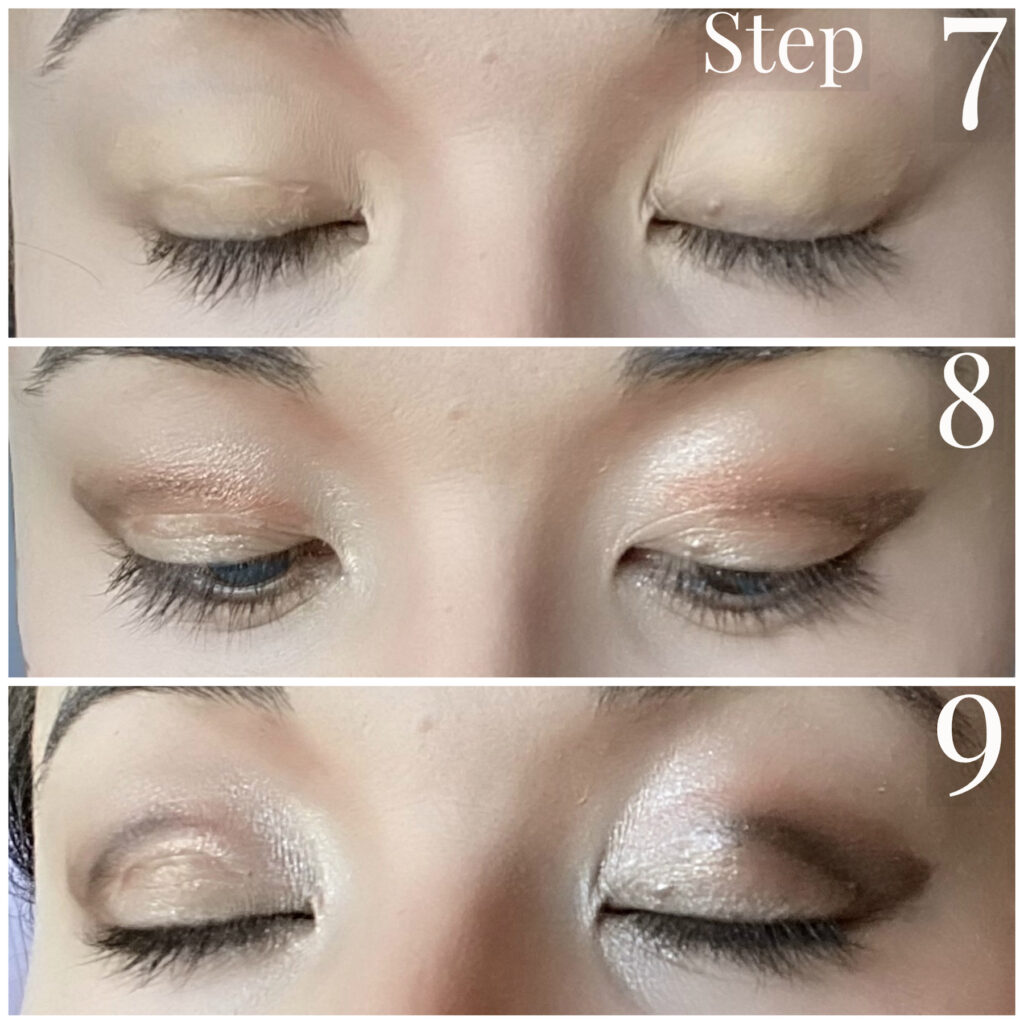
Step 7. Base Eyelids
Using the same Concealer as earlier, I conceal the tops of my eyelids, then place white eyeshadow over them to set it. This will make the eyeshadow more visible and help assist a smoother application.
Step 8. Brown Eyeshadow
For my eyeshadow, I have been using Matte Shimmer Eyeshadow Pallet. First using a lighter brown eyeshadow, I apply in the natural crease of my eyelids. After, I go in with a darker brown eyeshadow with slightly more precision on my eyelid crease. I also use this color under my eyes and work the product upward to create a slight wing. This process will give more depth to my eyes. Then I apply white shimmering eyeshadow to my inner eyelids.
Step 9. Black Eyeshadow
With even more accuracy, I use black eyeshadow on the crease of my eyelids. I also place this black color under my eyes, from the middle of my eyes outward. Blend together.
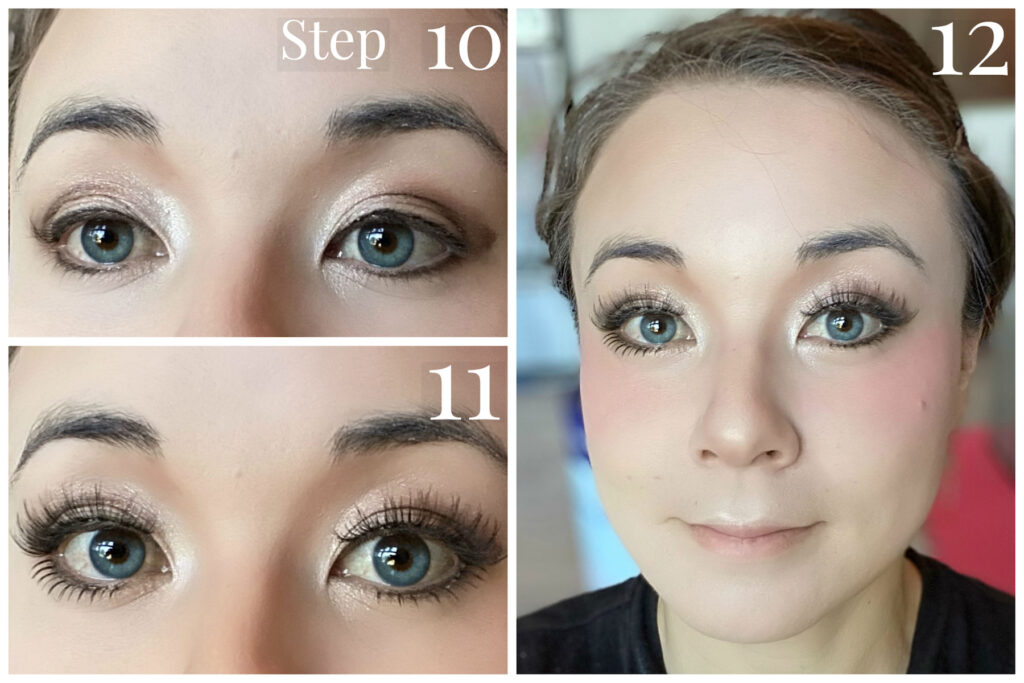
Step 10. Eyeliner
Using a Pencil Eyeliner, I outline my entire eye, except the inner most parts of my lower eye line.
Step 11. False Lashes
Next, onto one of my most favorite parts of makeup, false lashes. I love this Anime Eyelash Set as it gives me a wide variety of dramatic lashes. And now for the bottom lashes. I tend to cut my bottom eyelashes in half since I do not like them reaching the center most part of my eyes.
Step 12. Highlighter and Blush
I then use this Highlighter Pallet to highlight down the center of my nose, the tip of my nose and my upper lip. Highlighter is great for bringing out the naturally higher parts of my face. After, I Blush the tops of my cheeks.
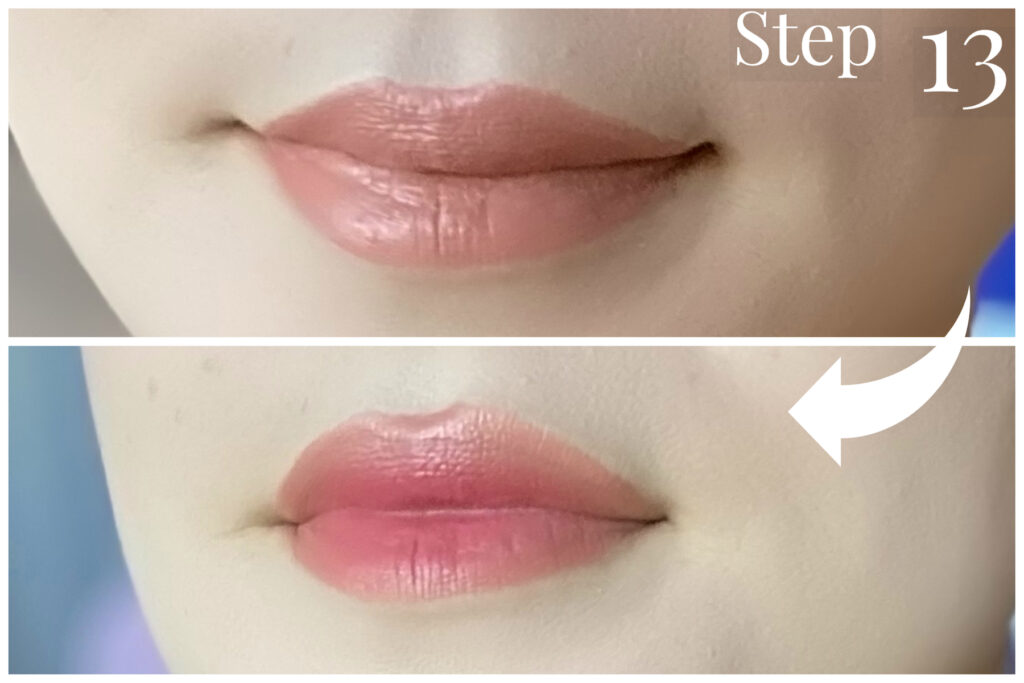
Step 13. Lips
And lastly, I do my lips with this Bobbi Brown Lip Color Set. I start out with a nude color for the base of my lips. I then go in with red lipstick and apply only on the inner parts of my lips. Blend well.

Finished!
Congratulations! In just 13 simple steps you are all done with your basic cosplay makeup. Now all you need is to put on your awesome outfit and show off your amazing cosplay. I decided to pair this makeup look with the very popular Rem and Ram sisters from the Re:Zero series, although this makeup can be paired with any character. I purchased Rem’s Wig and Ram’s Wig off of Amazon from the same seller, so both wigs are identical, other than color.

Basic Cosplay Makeup – Final Thoughts
This cosplay makeup is great for many female characters as it appears very natural and endearing. All of the products needed can be found at very affordable prices and are available at most drug stores like CVS and Walgreens. If you are interested in my other cosplays for beginners, check out my Daisy Mae Cosplay as well as my Bowsette Cosplay. I hope this tutorial has helped you with your cosplay endeavor. Stay tuned for more content!