
Rating: 9.8/10
Knowing about my makeup blog, my brother gifted me the Neewer 18″ Ring Light Kit for Christmas this past year. I immediately feel in love with this ring light and to get straight to the point of whether it is worth it or not, it is definitely worth it! Shout out to Casey for the amazing gift 🙂 If you are in the photography or videography industry, or just love taking photos, this is a must have. Whether you are taking photos and videos of models, yourself, food, products, you name it, there is a night and day difference while using the Light Ring.
Before I started using the Neewer Ring Light, I was very restricted to the time of day I could take nice photos. Anytime before 3pm was way too bright and anytime after 5pm was way too dark. I had much difficulties trying to fit my photoshoots between that minimal 2 hours of “golden hour.” It often delayed my posting schedule as I would have to wait till the next day to take photos if makeup or something else ran long. Once I received the Ring Light, I can take amazing photos at anytime and anywhere. This product has upped the quality of my material, and flexibility of when I can take photos. Keep reading for a further, in-depth breakdown of the product and sample photos.
Disclosure: Some of the links below may be affiliate links, which at no extra cost to you, I’ll get a small compensation. But don’t worry, I’ll only link to products that I have personally tried and loved. Using my links also helps me out a ton!
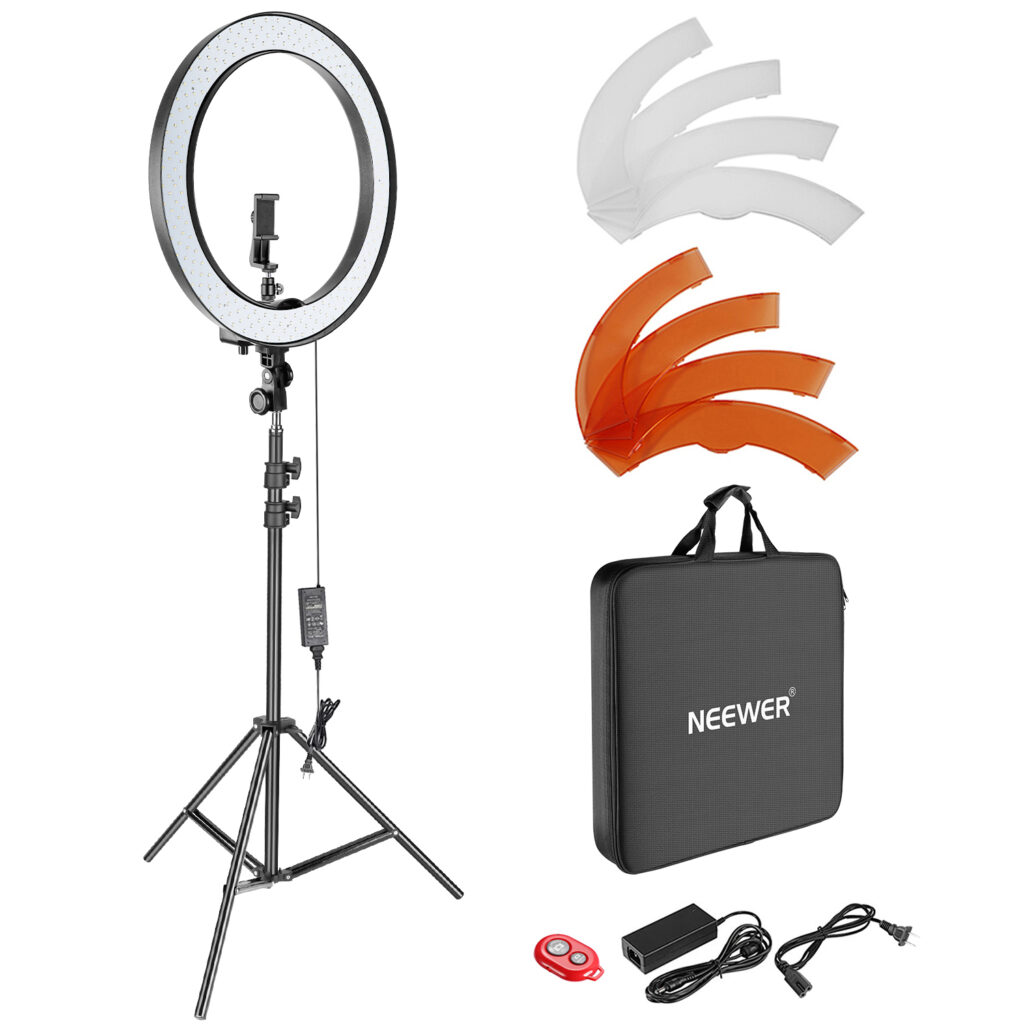
Specifications and what’s included
- The Neewer Ring Light has a diameter of 18 inches/48cm
- 55W 5500K LED Ring Light
- 61 inch/155cm light stand
- Smartphone holder (compatible with iPhone 8 Plus/8/X/7/6, Samsung Galaxy S9/S8, etc)
- Shoe adapter (compatible with most DSLR cameras)
- White color filter for bright, intense lighting
- Orange color filter for warmer, softer lighting
- Power chord adapter
- Easy to transport ring light carrying case
- The ring light is able to stand straight or tilt downwards at an angle
- Light is dimmable from 1%-100%
- Mini bluetooth red shutter remote also included
See the difference
I am sure you have heard the old saying “Don’t believe it, until you see it.” So don’t just take my word for it, take a look at the difference for yourself.
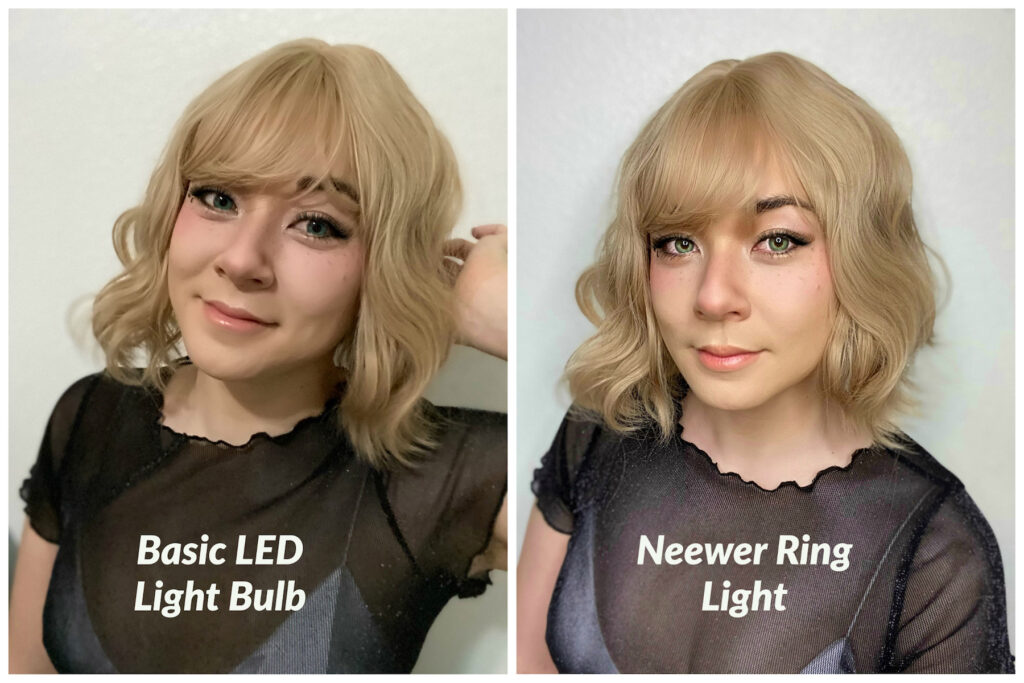
Both of these photos are taken with my IPhone 11 Pro Max. The difference is extraordinary. The photo on the left is taken during the early evening in a room with LED lights. The photo is not only dark, it looks grainy and much lower quality. I cannot see the details in my makeup, and everything looks just a bit blurry. Now, the photo on the right is taken just seconds after, in the same room, with the same phone. The clarity and brightness is astonishing. I am able to see the different features of my makeup and it really brings out what I am trying to promote. Once I started using this light ring, there is no way I can go without it now.
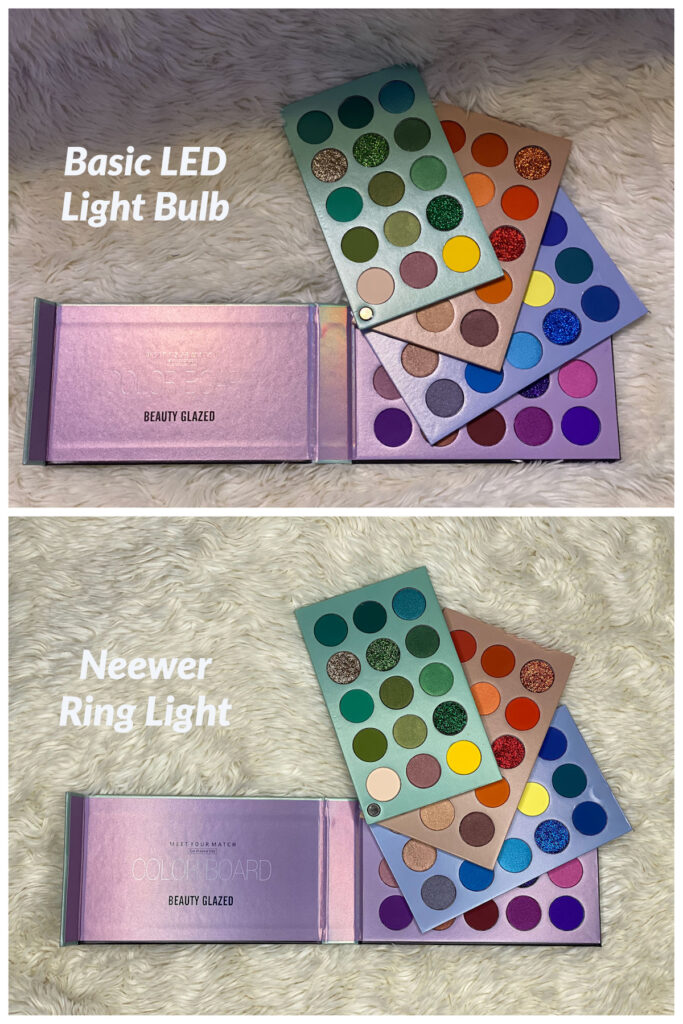
Even when I take photos of products, the discrepancy is huge. With a basic LED Light this Eye Shadow Pallet looks dull and shadows are being cast over the product. The left panel is also illegible. With the Neewer Ring light, the Eye Shadow Pallet looks bright and vibrant. The colors are more clear and the fine print is legible. For any type of product marketing, having perfect lighting in pictures is always very important.
Pros and Cons
Pros:
- White and warm filter is included with the product
- Light is capable of dimming in order to achieve the perfect level of brightness
- Big enough light to brighten a large area
- Comes with a convenient carrying case and hands off bluetooth shutter
- Compatible with most smartphones and DSLR Cameras
- The light is able to face straight on as well as angle downward in order to optimize where you the light is needed most
- Neewer Ring Light brings out details and clarity to all your photos
- Turns amateur photography to nearly professional photography
Cons:
- Does require a small bit of setup (simple instructions are included)
- The tripod doesn’t seem to fit in the carrying case (not a big deal for me since I always have it out of the carrying case)
- The ring light sits a bit heavy on the tripod, adjust with care
- Some consider the price to be somewhat expensive (so worth it though!)
Natural Lighting VS Neewer Lighting
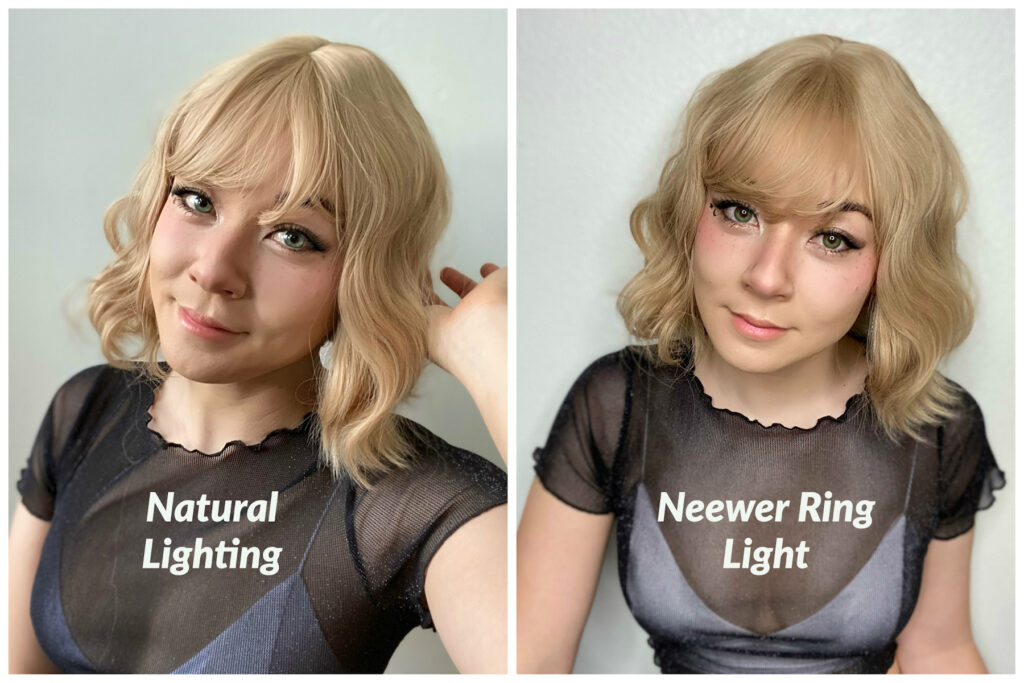
Is the Neewer Ring Lighting better than natural lighting from the sun? This is a tough call, but personally speaking, I do favor the Neewer Lighting over natural sunlight. I am very pleased with both of the pictures above but I do prefer the right side as there are no shadows cast across my face and I can see the detail in my makeup much more clearly. For this look, I applied fake freckles with an Eyebrow Pen and in the natural lighting photo, the sun seemed to have washed out parts of my makeup, making it harder to see. I also find with the Neewer Light, there are no shadows and my freckles are more visible. It also softens my skin a little more than the natural sunlight.
The convenience of the Neewer Light is also a huge plus in my book. It allows me to take great photos when the sun is beaming down hard and when there is no more sun at all. Most people setup their workspace indoors, and getting great natural light is sometimes impossible. Fear no more, the ring light is here for your rescue! Overall, I do love both photos but for me, the Neewer Ring Light is the winner.
Neewer Ring Light Review – Final Thoughts
I am so happy with my Neewer Ring Light. I honestly did not think I needed it until I started using it. My photos with the Ring Light look much more professional and I can take great photos anytime and anywhere. Now that I am using this product for every photoshoot and video shoot, I can confidently say it is well worth the price.
Hope you found this article helpful! If you want to check out more of my content please take a look at my E-girl Inspired Makeup as well as my Japanese VS American Makeup Tutorial. See you next time 🙂


Lovely review