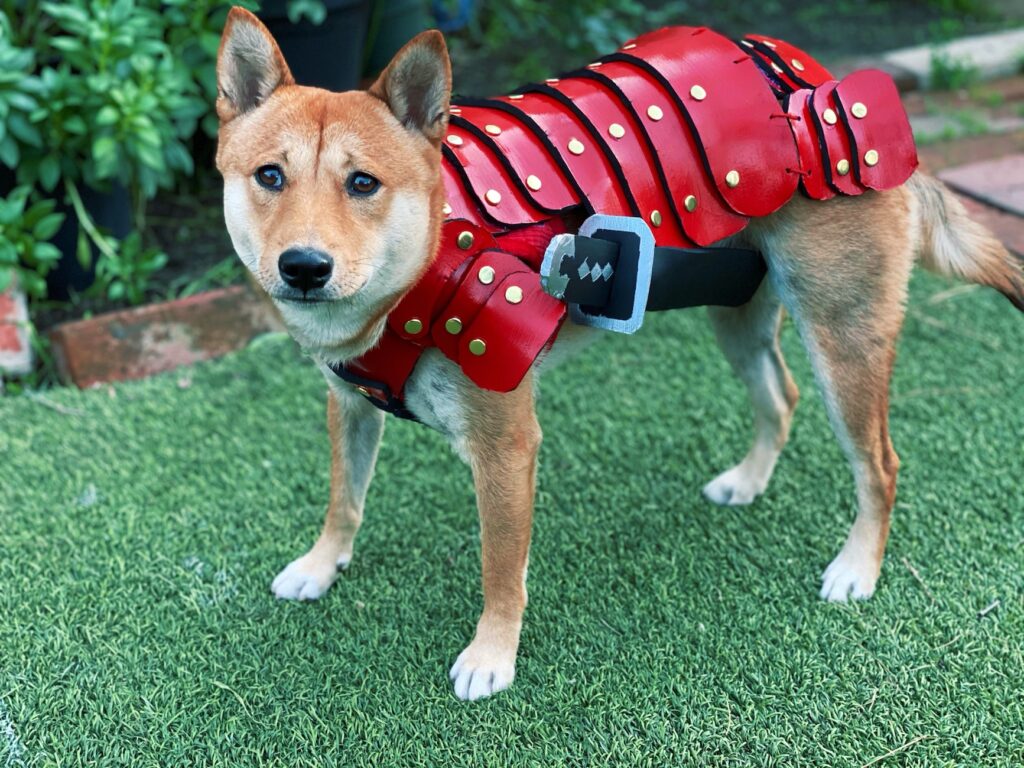
Is there anything cuter than your sweet little fur baby? How about your sweet little fur baby in a Samurai Outfit! Dawwww :3 This cosplay was extremely fun to make and the photos that came out of it were absolutely priceless. The Samurai Dog Outfit took me about a total of 8 hours over the course of 3 days to complete (including the time for paint to dry). Overall, this cosplay is very beginner friendly and great for all skill levels. In this post I will go into a detailed, step by step tutorial on how to recreate this awesome outfit for your furry best friend.
Disclosure: Some of the links below may be affiliate links, which at no extra cost to you, I’ll get a small compensation. But don’t worry, I’ll only link to products that I have personally tried and loved. Using my links also helps me out a ton!
Materials Needed
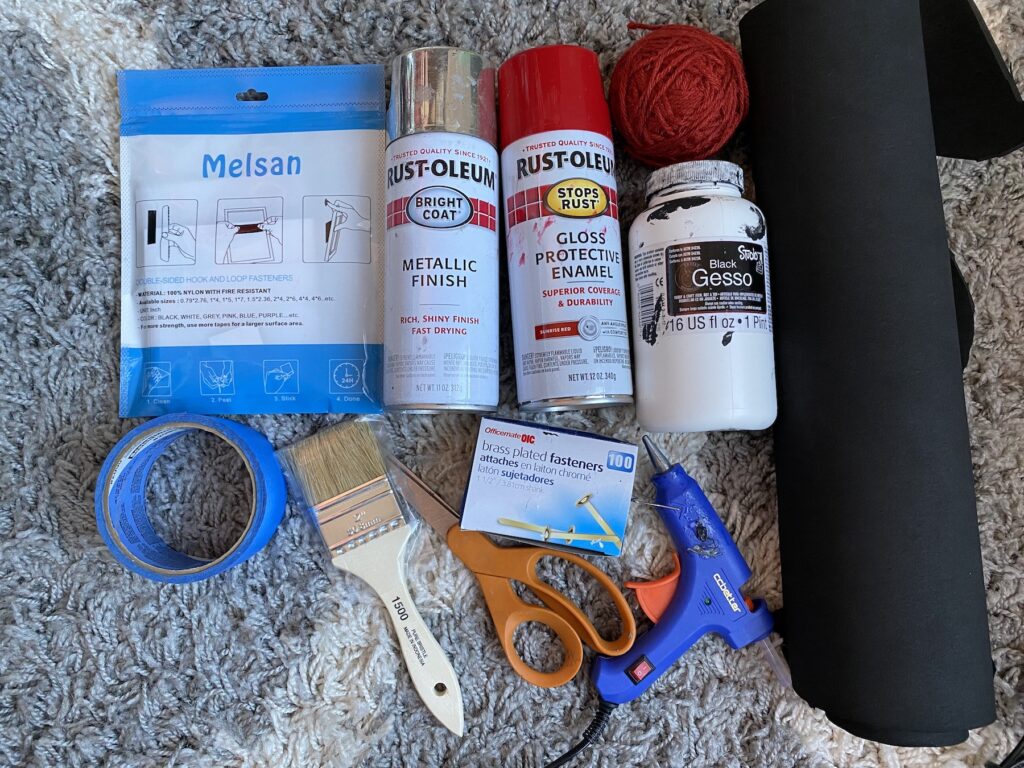
- Sponge Foam Rubber Sheet Roll
- Red Dog Harness (my dog is a large)
- Painters Tape (any tape from home will work)
- Heat Gun or Hair Dryer
- Paint Brush
- Black Gesso
- Sunset Red Gloss Spray Paint
- Metallic Finish Spray Paint
- Brass Plated Fasteners
- Velcro Strips
- Maroon String
- Hot Glue Gun
- Scissors
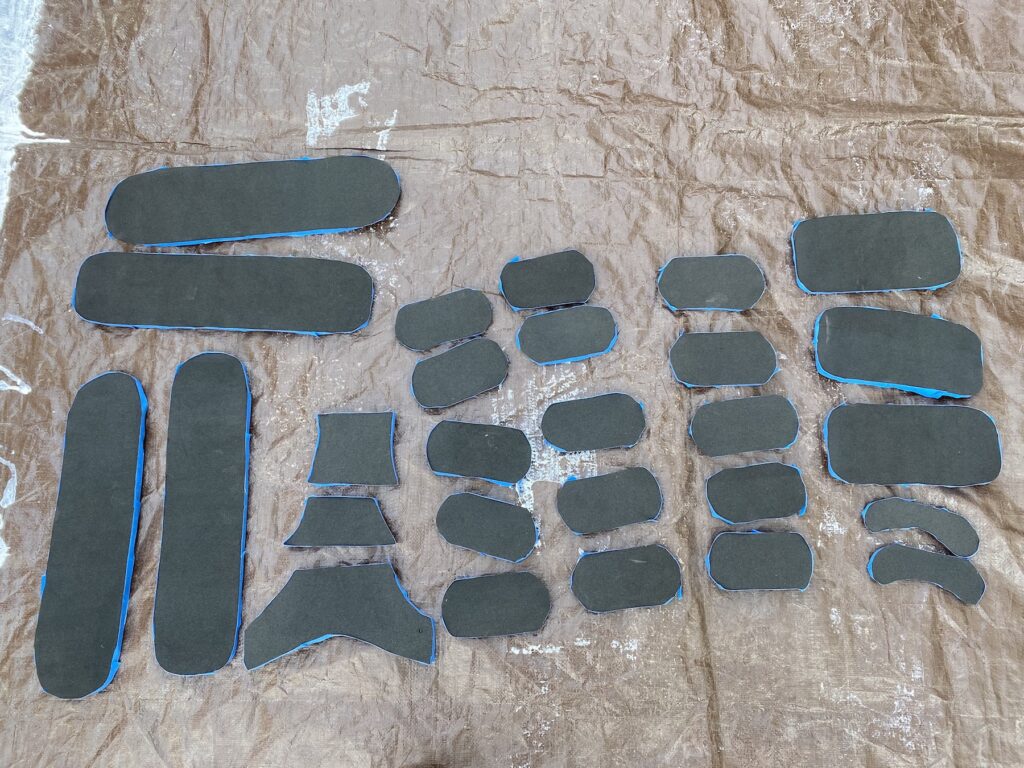
Step 1. Cut out all your shapes from the foam

- 3 pieces that are 3inches (7.62cm) by 6inches (15.24cm)
- 4 pieces that are 3inches (7.62cm) by 11inches (27.94cm)
- 15 pieces that are 2inches (5.08cm) by 3.5inches (8.89cm)
- 2 pieces that are 1inch (2.54cm) by 3.5inches (8.89cm) [banana shaped]
- 1 V-shaped
- 1 inverted trapezoid
- 1 trapezoid (for these last 3 shapes you can follow the chest pattern from the dog harness)
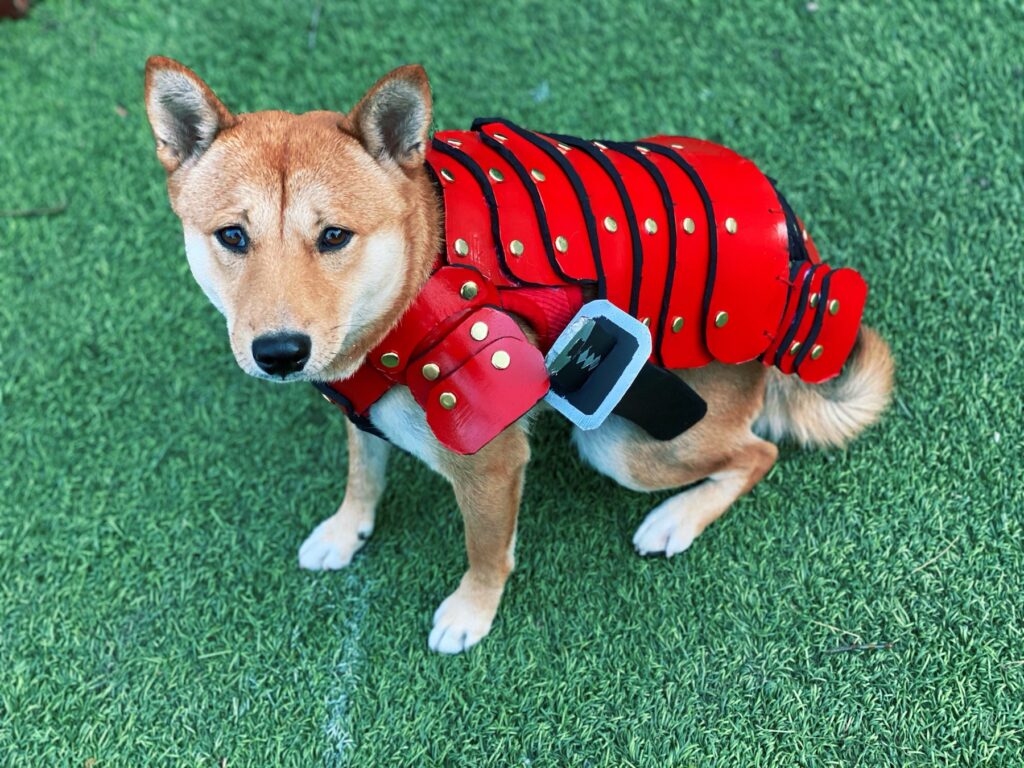
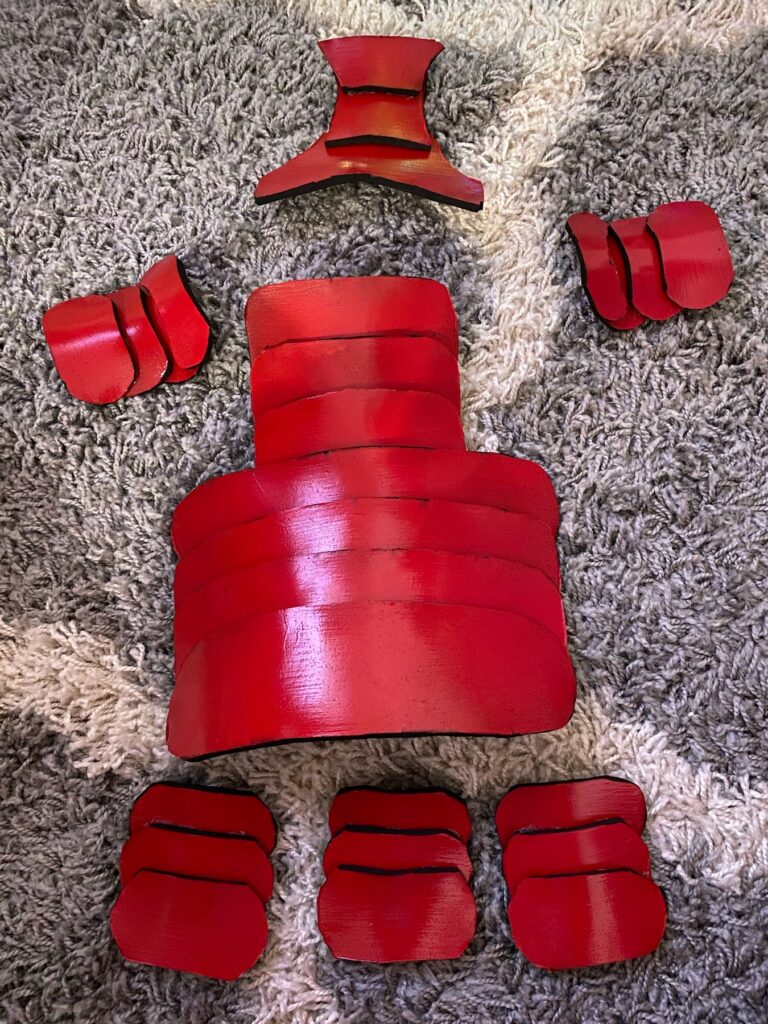
As pictured above, these are all the shapes you will need to cut out of the Sponge Foam for the armor. Just for reference, my shiba inu, Aki, is about 26 pounds, 25 inches long from nose to bum, and 18 inches tall from the top of her head to her paws. If your fur baby is around the same size as mine, feel free to follow these measurements exactly. If not, it is very easy to adjust these tile sizes either smaller or larger for the perfect fit. As you are making this cosplay, always refer back to your dog and accommodate accordingly.
Starting from the top of Aki’s shoulder blades I cut out three 3in x 6in squares and rounded the edges. Going down to her mid-back I needed four 3in x 11in squares. The next pieces I cut were fifteen 2in x 3.5in ovals. Nine of these pieces were placed on the lower back and three on her right shoulder plate and three on her left shoulder plate. The top of her shoulder plates are 1in x 3.5in banana shaped pieces (two of these pieces are needed). While referring to the picture above, the three pieces on the very right are her chest plates. I cut out one V shaped chest piece, one slightly inverted trapezoid, and one normal trapezoid. (To get an idea of how these pieces will come together, scroll to the fifth photo below).
The Sword

For her sword, I cut out a long rectangle that is 12in x 2in. Round one end of the rectangle to be the handle. Next cut another pieces about 2.25in x 3in and make a small skinny opening in the center of the rectangle. The long piece will fit into this opening that you have just created to make a sword like appearance.
Step 2. Tape up the side
For this cosplay I wanted to keep the sides of each tile black to intensify the red color and give it more pop. I simply sliced Painters Tape into small slivers and taped up the sides of each piece. If you would like to paint the sides of your cosplay, please disregard this step.
Step 3. Shaping and applying Gesso
Using a Heat Gun (or a hair dryer), I heated up the foam tiles and curved them so they fit the natural curvature of Aki’s body. Heating up the tiles make shaping very simple and will help close some of the larger pores found on the foam.
Next, with a small Paint Brush, I applied thin coats of Gesso, allowing it to fully dry between each layer. I applied three layers of Gesso on each plate. Make sure you apply the Gesso in thin layers as it is more prone to cracking the thicker the layer.
Step 4. Spray Paint
Spray paint can get messy, so be sure you have a large work space and have your pieces over a sheet you don’t mind getting dirty. It is also important to wear a respirator to prevent the inhalation of the toxic chemicals. I keep the Sunset Red Spray Paint about 1 foot away from my project as I lightly spray. Start with a thin layer first and once it fully dries, apply another layer on top. Repeat this process until the desired color is reached.
The Sword
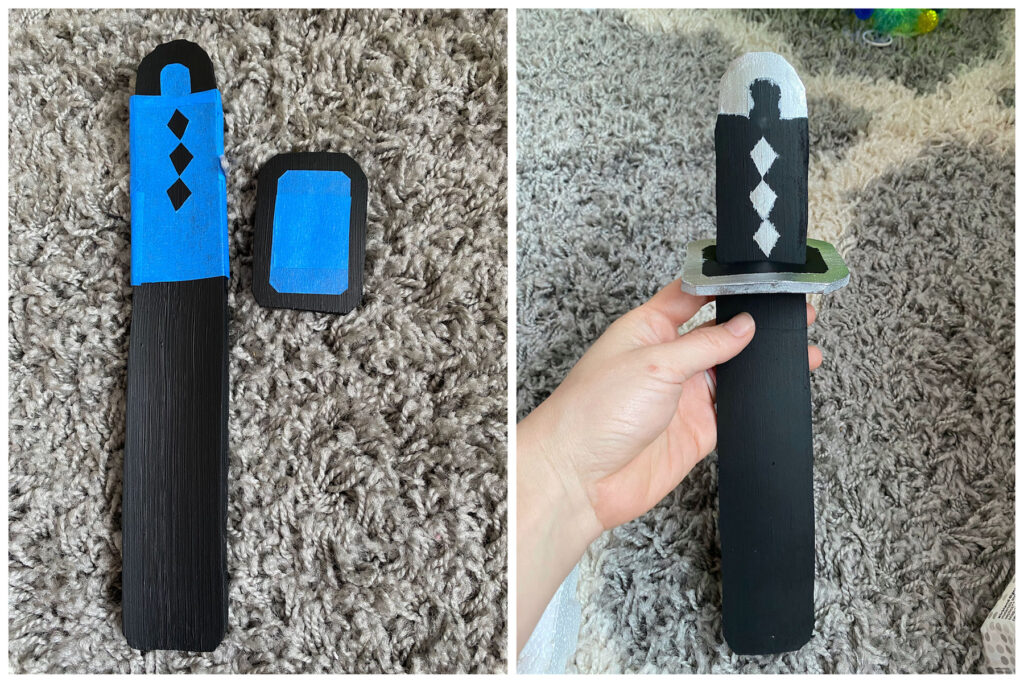
I cut out the design I wanted on Aki’s sword and taped it onto the foam as shown above. Using the Metallic Finish Spray, I lightly coated it to fill in the cutout details.
Step 5. Gluing parts together
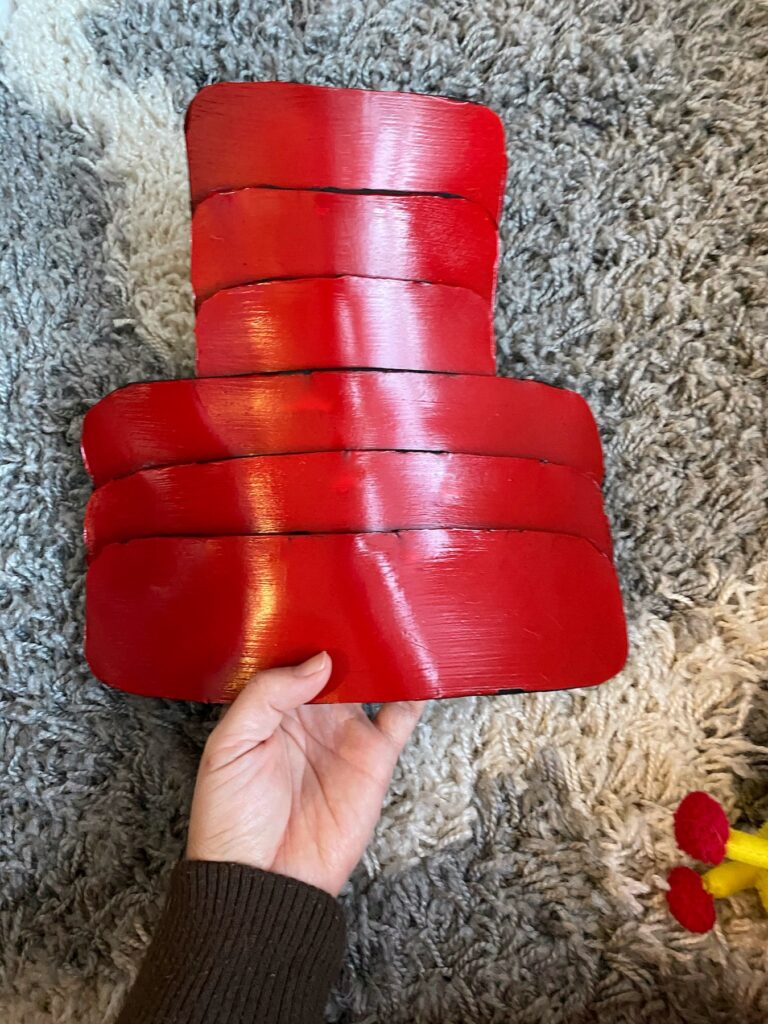
Now, we are getting into the fun part and really seeing the cosplay come together (literally)! Using my Hot Glue Gun, I started with her back plates by gluing the three 3in x 6in on top of each other. Each tile is overlapped about an inch. I then got the four 3in x 11in and continued the same pattern, while making sure everything was centered.
Using that same process, I took all fifteen 2in x 3.5in and glued them together in sets of three. Three of these sets are for the lower back of her armor and two of them are for the shoulder plates. I then took the two meant for her shoulder plates and glued the banana shaped piece on top. Make sure that you are gluing these pieces together to shape your dogs body. Most of these will be slightly curved inward, like a rainbow.
Onto the chest plate, I started with the V-shaped chest piece and glued the slightly inverted trapezoid on top and the last trapezoid on top of that.
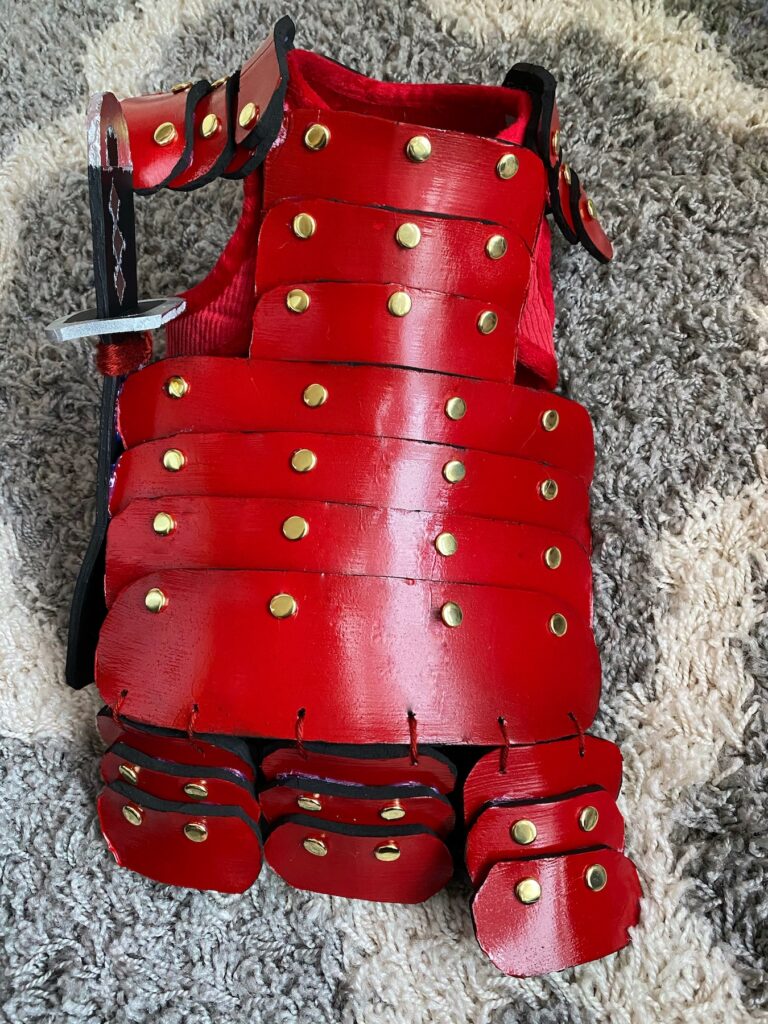
Awesome! Your armor is really coming together. You should have 7 different parts and it should look a little something like this.
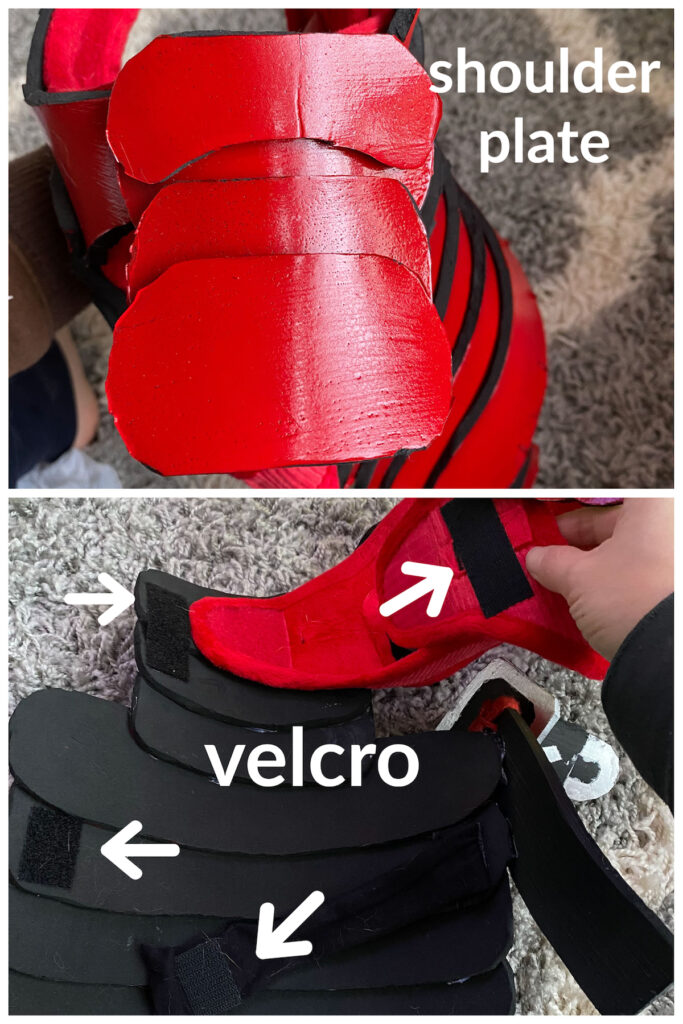
Step 6. Glue the armor onto the harness
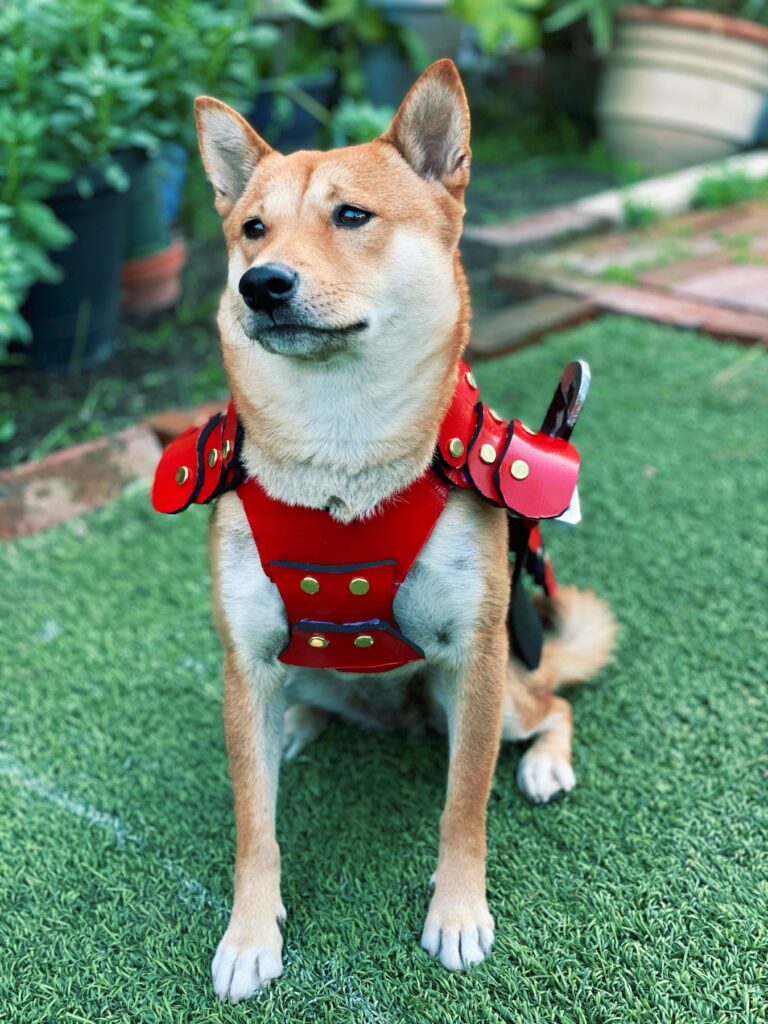
I first glued on the chest plate to the center of my Red Harness, then glued only the left side of the back panels to the harness. I kept the right side unglued as that is where the harness opens for Aki to get in and out of. In order to secure that spot down, I got a small piece of Velcro and stuck it on the underside of the right part of the armor. I stuck another piece of velcro under the right and left side of the long 3in x 11in and attached a small piece of cloth that will go under her belly for extra security. I then attached the shoulder plates onto the harness.
Step 7. Applying red string
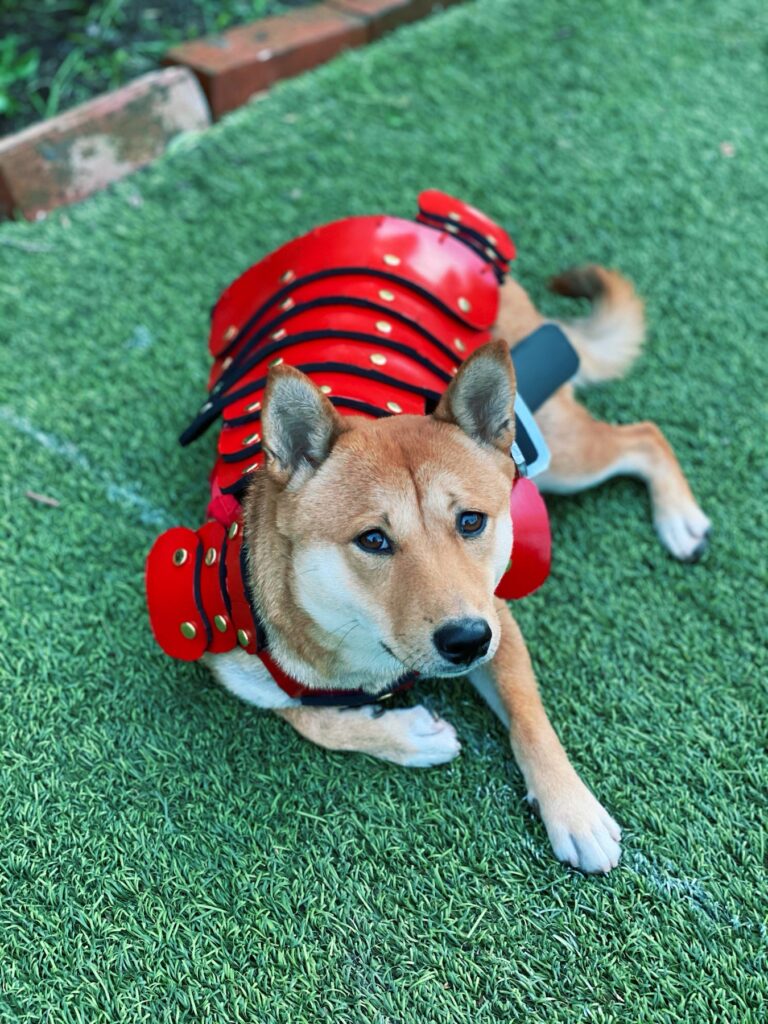
I made 6 holes at the bottom of the armor, around just under 2 inches apart. Next, I made two holes at the top of each of my three panels and connected them together with the Maroon String. Using the same maroon string, I wrapped it around my sword about 10 times and glued the sword down onto the left side of my armor.
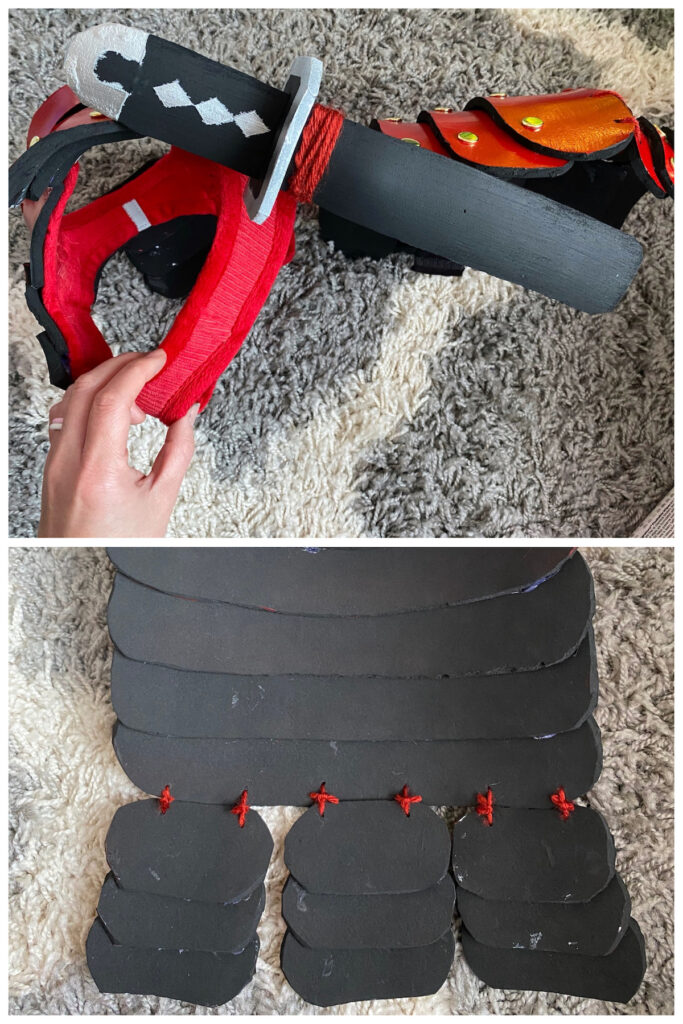
Step 8. Adding brass fasteners
For this last and final step, I simply cut off the legs of the fasteners so only the head remains, and glued the head of the fasteners onto the armor. I pretty much put the brass fasteners at the top of each of my plates, but this part does not have to be exact at all. Play around with it and go with what you think looks best.
Your Samurai Dog Outfit is Finished!
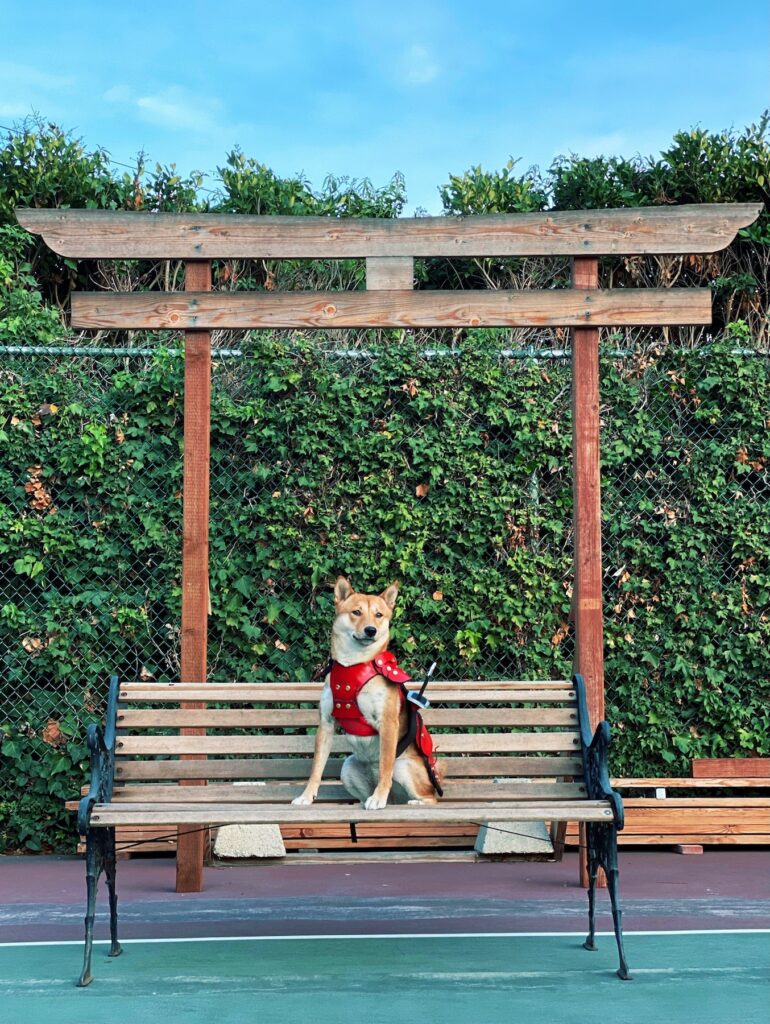
There you have it! A completed samurai dog outfit for your best furr-iend. I was pleasantly surprised at how simple the cosplay was and how great it looked once it was all finished. The only time consuming part was having the paint dry but if you are doing this mid-day the sun will dry it up real quick.
This is great for halloween or any occasion really. When Aki wore this, she got so much love and attention it was incredible. It did take her about 5 minutes to get use to, but once she did she didn’t seem to mind wearing it one bit. She wore it with honor and integrity.
If you are interested in more cosplay tutorials check out my Re:Zero – Rem and Ram Cosplay, Animal Crossing – Daisy Mae Cosplay, and Super Mario – Bowsette Cosplay. I hope you found this post helpful. Let me know your thoughts and if you tried this yourself, please share as I would love to see your finished product.